
Play-House Bed Project
 With Olivia growing up fast we’d known for a while that she would soon need a full-size bed. When we first asked her what type of bed she wanted, we showed her some pictures of children’s beds, and this included a few of the play-house variety where the bed is raised off the floor, with space underneath for toys and steps or a ladder running up to the bed. Well, once she’d seen beds with steps (and some with slides) I think she was sold on the idea and was adamant that she wanted one “with steps”…and that was about all she’d say 🙂
So we did some research and looked at a whole bunch of beds but couldn’t really find one which ticked all of the necessary boxes. Most of the beds we saw were either too low to the ground, making the play area pretty useless, or had a ladder instead of steps (don’t forget that it needed to have steps!). Also the general appearance of many wasn’t great and so in the end we figured, why not just build one for her.
Before starting the project we needed an idea of what we wanted to make. After spending a loooong time scouring the internet for ideas we finally agreed to make something resembling this bed which we found on Pintrest. As you can see, this is actually quite a small bed, not a full size single and it also has a ladder rather than “steps”. But in terms of the look and feel, it did look like what we wanted.

The bed we wanted to base Olivia’s bed on
While we were researching all of this we came across a bed for sale on eBay for a mere £25. It was second hand, but was solid pine, full size single and was raised. It wasn’t really high enough to make good use of the space below and it had a ladder instead of the much sought after “steps”, but we decided that rather than trying to build the entire bed frame myself, I could just modify it to suit our needs. So I bought the bed. You can see it in the pictures below.

We bought a raised single bed from eBay for a bargain £25!

This is all of the parts for the bed I bought
Now I had a bed frame which I knew would be the correct size, and also an idea for the finished look. The next stage was (as usual) to design and build the bed in 3D on my computer. This would help me to ensure I could get measurements correct and buy the right amount of material.
The final design looked pretty cool. It required only minimal changes to the framework and just needed a few larger cut panels to be attached to it and painted.

This was the final design
You can see from the next image the changes I needed to make to the framework itself. Unfortunately because the original bed had a step ladder which intersected two of the longer side supports, I needed to create two new side supports myself which would span the whole bed. I also needed to extend the height of the legs by about 30cm each to allow enough space underneath the bed to play in. More on this later.

The existing bed frame is shown in brown and the blue parts are additional parts I needed to make
The steps were quite simple in design, but by allowing the bottom two steps to hinge upwards they doubled up as a useful storage unit as well.

I designed the steps so that two of the steps would lift and provide storage
Because a lot of this project required sheet material (MDF), I needed to figure out how many sheets would be required. By designing the bed in 3D it meant I could accurately work out how much MDF to buy. You can see from the image below how I planned my cutting setup.

Having made the design I could calculate how much MDF sheet I would need to buy
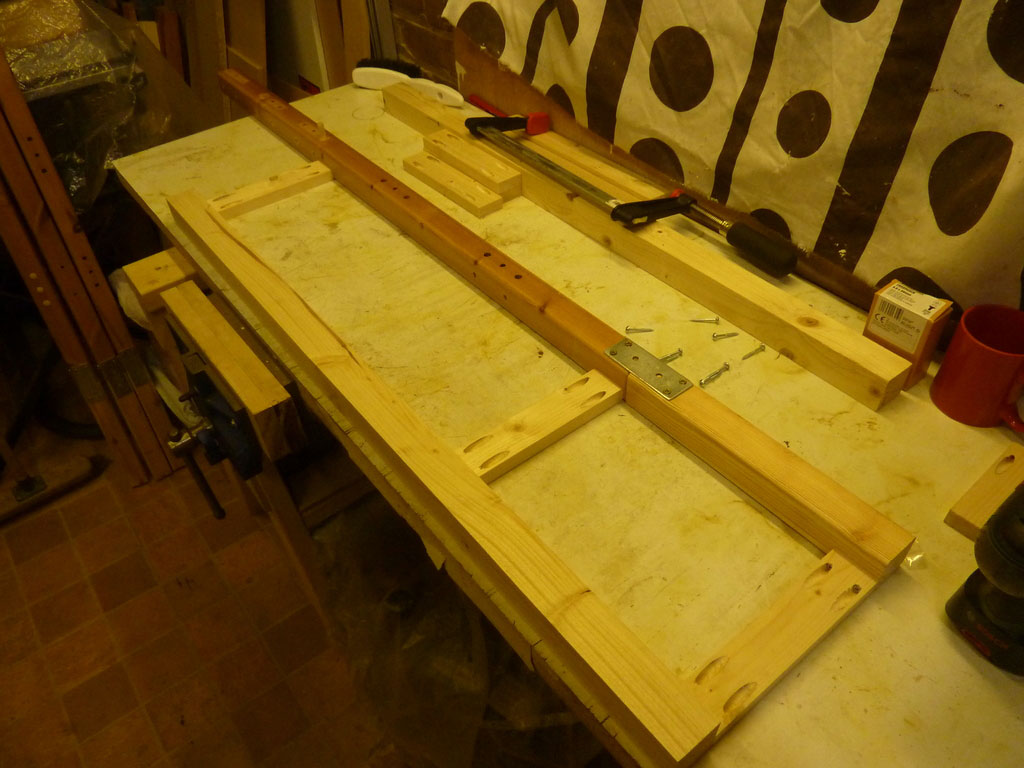
Finally with everything planned I was ready to start. The first job was to extend the existing bed frame legs. This involved joining 4 x 30cm lengths onto the bottom of the existing legs. I was quite paranoid about these joints in particular because the whole structure of the bed would be reliant on them. I really didn’t want the frame to be wobbly and potentially dangerous. So I decided to use three methods of attaching the pieces together; namely a long thick dowel, lots of glue and metal joining brackets.
First I cut the extensions:

Cutting 4 x 30cm extension lengths

The cut extensions
Next I rounded the edges over to make sure they weren’t sharp and also to match it to the existing legs which had rounded edges already.

I rounded the edges extensions to make them safe and match the existing legs

You can see the rounded edges here
To joint the pieces together I drilled holes into both the bottom of the leg and the top of the extension block. I cut a section of dowel long enough to sit well in the drilled holes and then used a “lot” of glue to hold the parts together. Unfortunately I didn’t have a clamp long enough to apply pressure to the glue while it dried so I improvised a makeshift clamp with a heavy pot of paint and gravity 🙂

I drilled a 10mm hole into the base of each leg

I also drilled the extension and cut a section of dowel to fit it

The extension would attach like this

Next I added a “lot” of glue

You can see the glue between the parts here

And I left them overnight with my makeshift clamp in place

The finished glued leg extensions
As a final precaution to ensure the legs were strong, I added metal joining plates to each of the legs as you can see below

Adding metal joining plates

The plates were simply screwed across the joins

All legs completed
With the legs extended, next I needed to add the new extended support structure to the front legs. I cut out 6 spacing parts and used my pocket hole jig to allow me to attach them to the legs as you can see below:

Cutting the front extension spacers on the mitre saw to equal size

I used my pocket hole jig to drill pocket holes

The completed spacers

Joining the spacers onto the front extension legs
The extension leg attached to the bed leg

And again with the other side
I also needed to add an angled support to the tops of the extension legs which would act as supports for the roof piece. Again I cut these on the mitre saw and attached them to the legs as shown below:

Cutting the roof supports on the mitre saw at 45 degrees

Roof support attached
Once that was done I could put the bed frame sides together to see how the extensions looked and test the fit

Test fit of the bed sides with completed extensions
The final bit of work required on the bed frame itself was to create the new side supports which would span the entire length of the bed. As mentioned above the original bed had incorporated a step ladder which intersected 2 of the side beams which meant 2 of the existing sides were too short. I needed to cut 2 more. It was simple enough to just buy timber at the correct size and I cut it to length on the mitre saw. I also used the router table to round the edges over to match the existing parts.

Rounding over the edges of the new side beams

Side beams completed with rounded over edges
The next step was to buy and cut the large MDF parts that were needed to clad the bed. Because I had already done the plan I knew how many sheets to buy and got it all in one go. It wasn’t until I had bought it and moved it into my garage that I realised just how little space I actually had to work in…as I discovered this became a big problem. More on that later…

The MDF sheets bought from a local builder’s merchant

Once I got the sheets into my workshop, I realised how little space I had left!
Now the real challenge began. There was barely enough space to move the sheets inside my workshop, let alone cut them. So I had to take them onto the front drive to cut. There were several problems with this; firstly if the weather was bad, I couldn’t do anything. Secondly I needed to dismantle my workbench and take the two saw horses from under it each time I needed to work outside (This happened several times in total) and finally even once the sheets were cut, I needed to store them inside, meaning I’d have restricted space for doing anything else…
Fortunately I was lucky with the weather most of the time on this project, and there were only a couple of days which I was not able to go out to work. So wasting as little time as possible I started to cut the sheets to size.

The setup I needed to use to cut the sheets to size included 3 saw benches, a few clamps and a circular saw
For the more complex parts like the steps I needed to draw out the cut lines and then had to solve a bit of a saw-guide puzzle when figuring out how to place the guide and how far each cut should go. But it worked pretty well in the end.

I had to draw out the more intricate cuts such as the step sides as you can see here

The steps needed some careful saw-guide management

As you can see the step sides turned out quite good
The house front was also quite tricky because it required cutting a hole for the window and the door. Again I used the circular saw but cleaned the edges with a hand saw. Also I needed to be very careful not to allow the sheet to break apart above the door at this was a weak point.

I drew out the window

And cut the majority with a circular saw and then finished off with a hand saw

The cut house front
For the roof I used my table saw to get a consistent cut all the way along the edge

Cutting the roof on the table saw
And finally I needed to cut the step fronts, tops and back panel. These were actually quite straight forward compared to the larger parts.

Cutting the step sections on the table saw

The cut step sections
And with that the panels were cut and ready! However, little did I know that the hardest part was yet to come…namely painting!
Because I was using MDF I needed to prime each panel with a suitable primer…front and back…and then each piece also needed at least 2 coats of paint. It might not sound like a lot of work, but when you are dealing with enormous pieces of wood and you have very limited space and each coat of paint required many hours of drying time before being able to do another…let me tell you that it was a “phenomenal” amount of work! The following pictures don’t really do it justice because they were taken over a series of weeks, but you can get an idea for the stages involved:

Ready for priming

Primed on one side…still the other side to do

I also needed to prime each of the smaller parts too

With most of the large parts primed, it was time to start painting

I left a bit at the bottom of the banister because it would be hidden by the steps

Pretty pink!

Also had to paint the smaller parts…

And this bit too…

Oh yeah, and all of these

…and that bit…

…not to mention the framework itself

…so much painting..

but at last…all done!
After all that painting I remembered that I also needed to cut and paint the door and window frame sections…so back to the mitre saw and yet more painting…

Cutting the mitred frame parts all together saved some time

However there was no quick way to do all the painting (sigh)
At last all of the painting was done and I could get all of the pieces together in Olivia’s bedroom, ready for assembly. However this stage took about a day and a half to complete!

All of the finished parts ready for assembly
I started working on putting the steps together. I carefully attached the step side to the banister making sure to keep them aligned. I then created some spacer pieces which I attached to the steps side and was able to use these to attach the other steps side.

That’s me! I’m attaching the step side to the banister making sure its perfectly aligned

Once aligned I added some spacers to the steps using my pocket hole jig

And then attached the other side
Once that was done I created a few more parts which would form the interior structure of the steps and would allow me to screw the step fronts and tops onto the structure from the inside, and so hide the screws.

I cut and added some extra parts to allow the front and tops to be screwed from the inside

And then started to attach the painted parts

Top step complete
For the bottom 2 steps I needed to attach 2 fixed parts to the back of each step which would be used to support the hinge mechanism.

I added the fixed parts for the hinged steps next

Next I attached the hinges

Completed steps with hinges
I still wanted to attach a hand rail, but I had not yet made the pieces and because they were only decorative, I decided to leave those until after the bed was complete.
With the steps complete, the next stage was to erect the bed itself. This was not too difficult, but did require a bit of gentle persuasion trying to get some of the dowels into place due to paint that had clogged the holes. However after a bit of messing around I managed to get the bed up and had all of the slats screwed in too.

Front bed frame section

The bed frame together and attaching the slats
Bed frame complete
Next I started to attach the painted MDF sides to the bed. This was quite simple and just needed some screws to hold it in place. There was no easy way to hide the screws in this case, but I don’t really think this is a problem.

Attaching the bed sides with scres

Attached one side

And again on the other side

Done!
For the front of the house I needed to construct a stud framework which would support the front MDF panel. The panel by itself was not strong enough to stand up to any bending and would have easily broken if anything had knocked into it (such as a small child for instance). The framework pieces had been cut and painted previously (Sorry I forgot to take pictures), and all I needed to do was to screw them together.

Stud framework for the front panel

Showing the front panel lined up with the framework
Before attaching the front panel to the framework, I added the door and window frame parts as you can see. Once these were attached, I screwed the whole front panel to the studs.

I added the door frame parts…

And window frame parts before screwing the whole panel onto the stud work
The last major part to be attached was the roof, but this was probably the simplest as it just needed to be screwed into the roof supports on both ends.

Roof ready to be attached

Roof screwed on
The final construction job was to attach the steps to the bed itself. This was actually pretty simple as I just screwed through from the inside in several places to make sure they wouldn’t topple. And with that the bed was done.

The steps were screwed to the bed from the inside
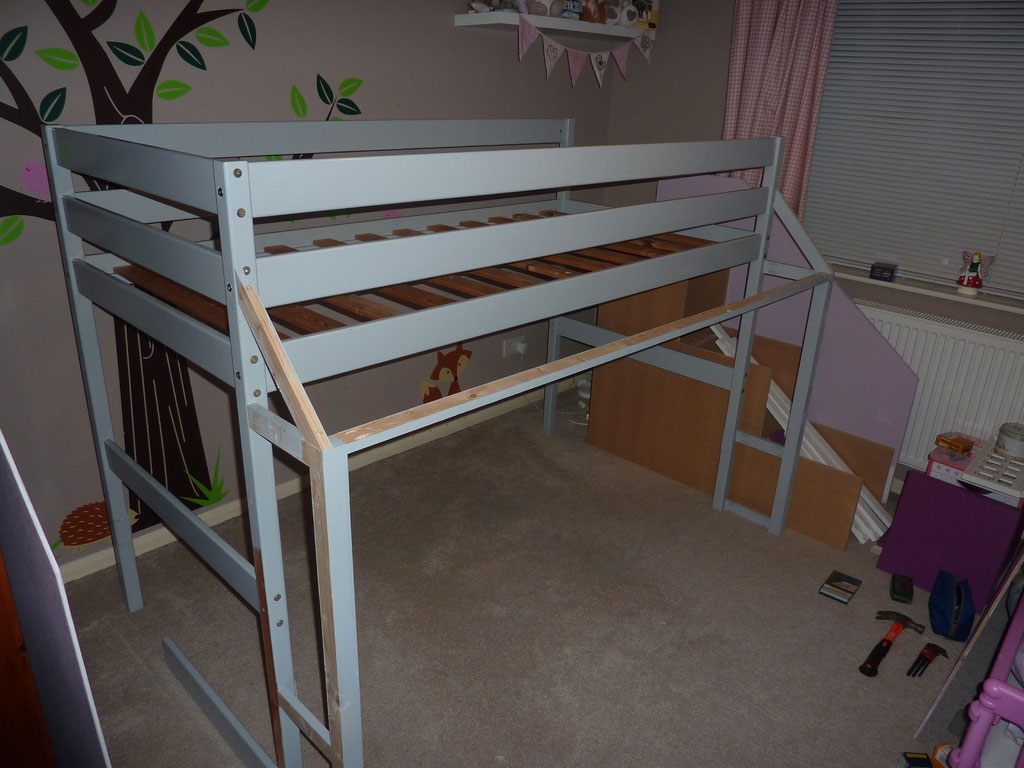
At this point the bed was complete. I still needed to add the skirting boards and a hand rail for the banister, but because these weren’t yet painted, we set the bed up for Olivia to use in the mean time.

Bed finished, just waiting the last few cosmetic extras

Inside the house you can see there’s plenty of space for Olivia’s toys
Once the skirting boards and hand rail were completed they were very simple to add onto the bed, but really added a lot to the final look and feel as you can see
The finished house bed with skirting boards and hand rail
I was very happy with how this project turned out. However I do have to say that this was also probably the most difficult project I have undertaken to date…not so much for the technical complexity, but rather due to the sheer size and amount of parts that needed to be made and also painted! Trying to find space for all of the large sheets of MDF while each dried was very difficult and also due to the space restrictions in my workshop I’d often cause damage to a painted surface which would then need to be re-painted, adding yet more time to an already long project.
Having said all that, Olivia seems to really like her new bed and at the end of the day, that’s all that really matters 🙂